Device management
Create a device, associated template, and bound box on the [Device Management] page, and you can view the device's screen monitoring in the device dashboard.
Device List#
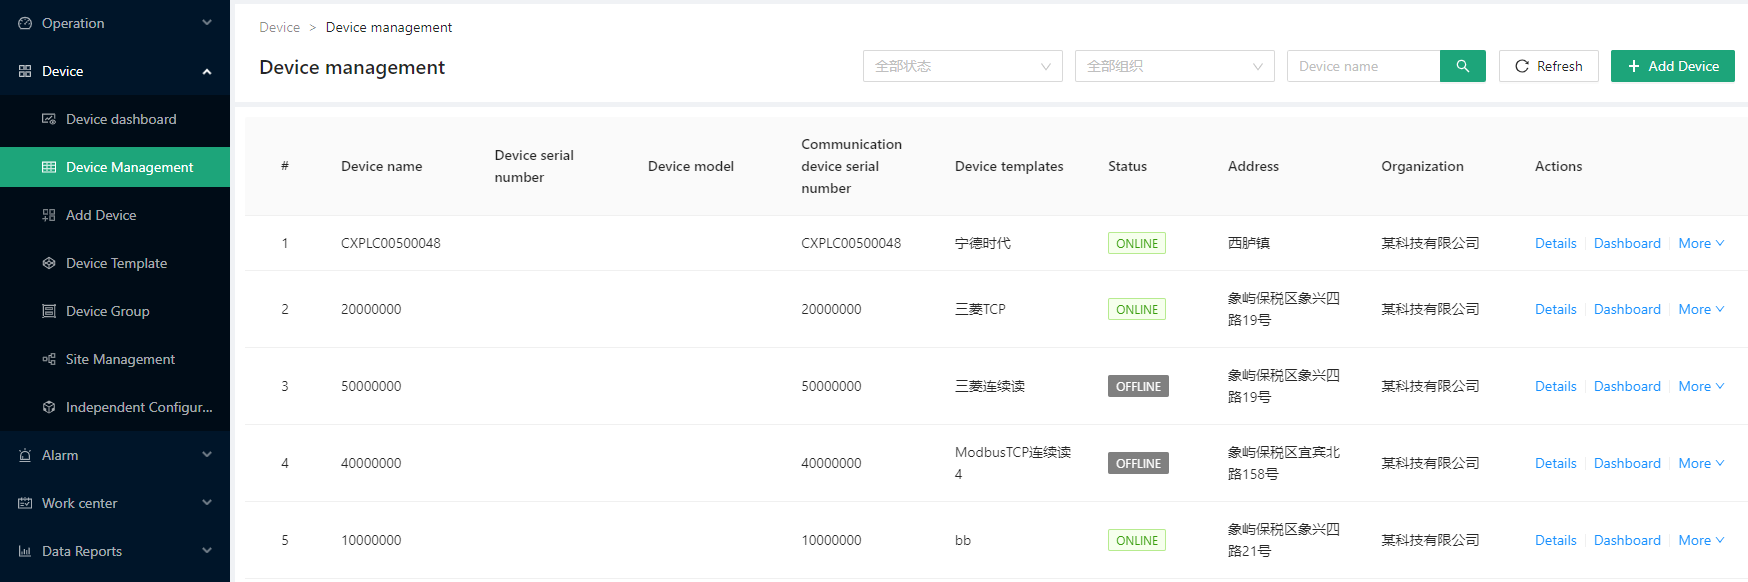 The device list page displays the devices for which the current user has viewing rights.
In the [Operation] column:
Click [Details] to view the detailed information of the device, please refer to the following [Device Details] description for this part
Click [Dashboard] to jump to the device dashboard page, please refer to [Device Dashboard] for this part
Create Device#
Click on the [Add Device] button in the upper right corner of the device list, or in the [Add Device] menu in the left menu of the system, to jump to the page for adding devices.
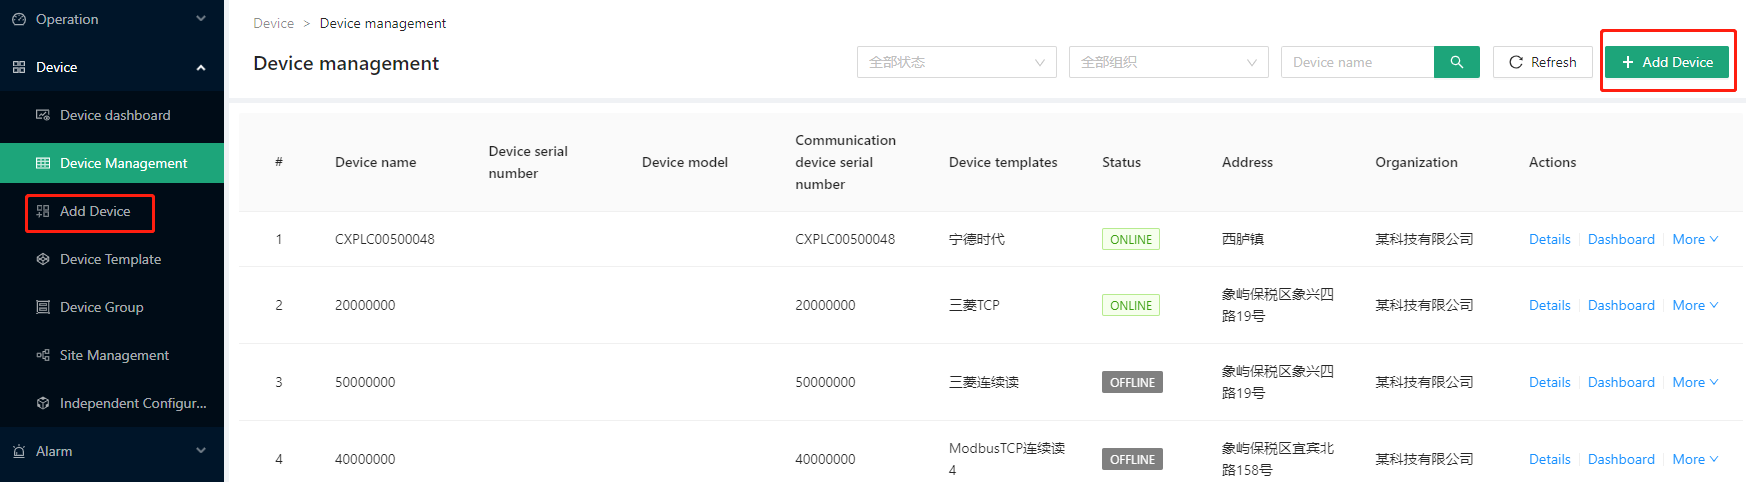
Please refer to [Add Device] for detailed steps of creating a device.
Device Details#
In the device list, click the [Details] link to jump to the device details page. The device details include: basic information, communication module, template configuration, video configuration, device documentation, work information, and device log.
Basic Information#
 Basic information is to display basic information such as the device name, device address, and device template of the current device.
Communication Module#
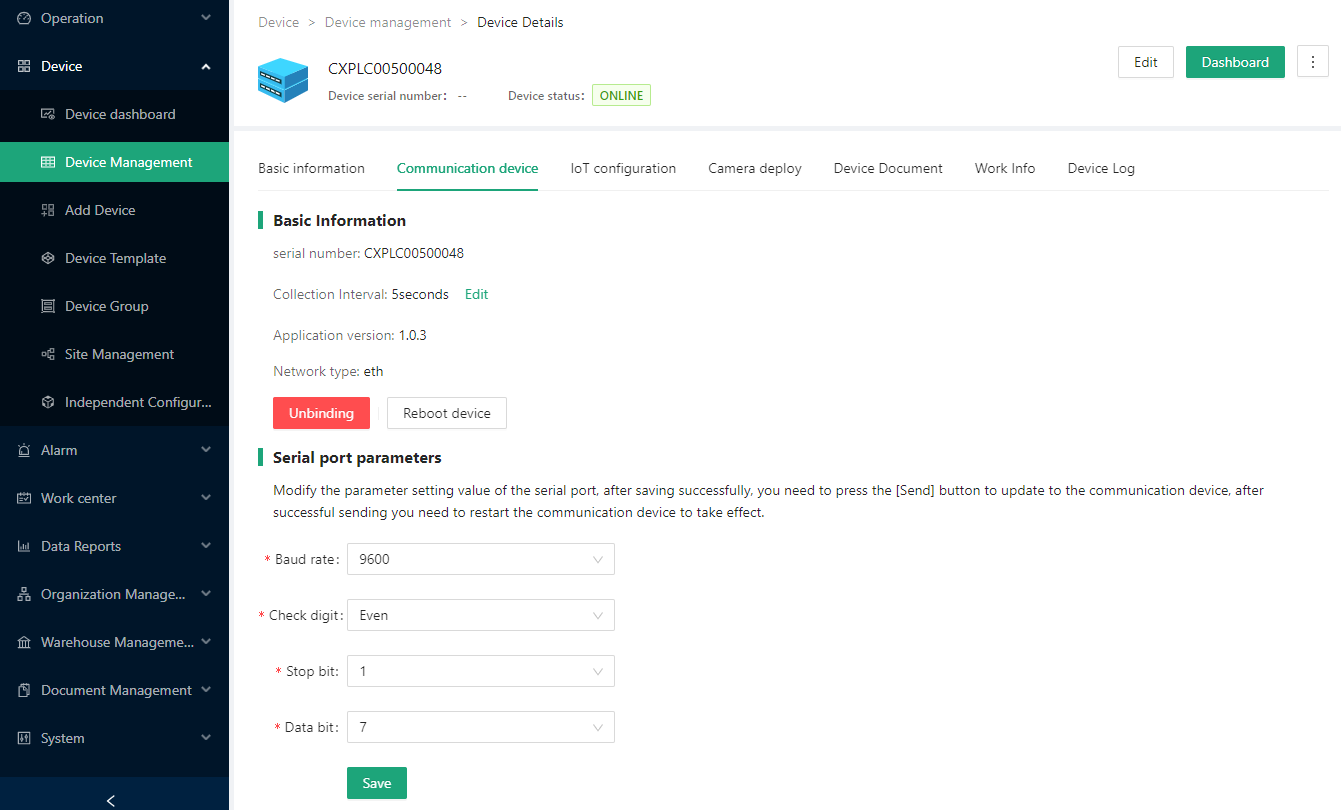 Display the serial number, firmware version, current network type, serial port parameters and other basic information of the communication module bound to the current device.
- Basic Information

| Field | Meaning |
|---|---|
| Serial number | The serial number of the communication module bound to the current device |
| Collection interval | The number of time intervals for the module to automatically report data, unit: second |
| Application version | The current version number of the module |
| Network Type | The network types currently used by the module include: 4G, WiFi, and wired network |
[Unbind] After pressing the "Unbind" button, the device is not bound to the communication module. After unbinding, the platform is no longer receiving any data from the device.
[Restart Device] After pressing the "Restart Device" button, the communication module will be restarted.
- Serial port parameters
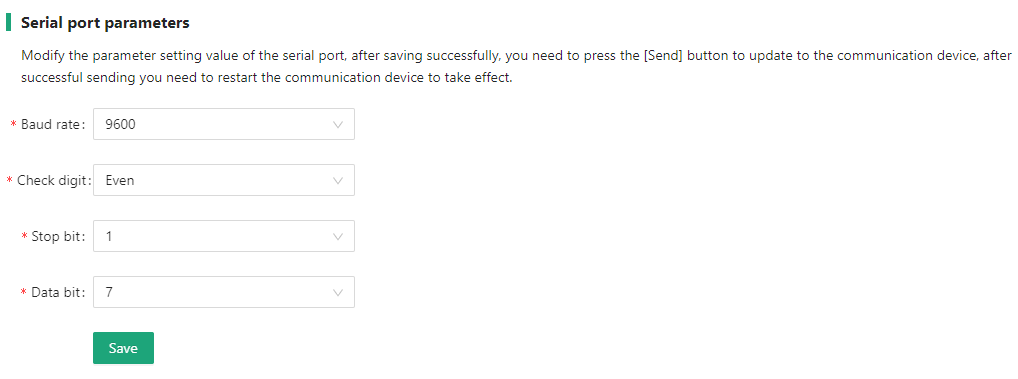 The serial port setting for the communication between the module and the terminal device. When the module communicates with the terminal device through the serial port, the setting takes effect.
note
When modifying serial port parameters, you need to "deliver" to the communication module, and then press "restart device" for the modification to take effect.
Template Configuration#
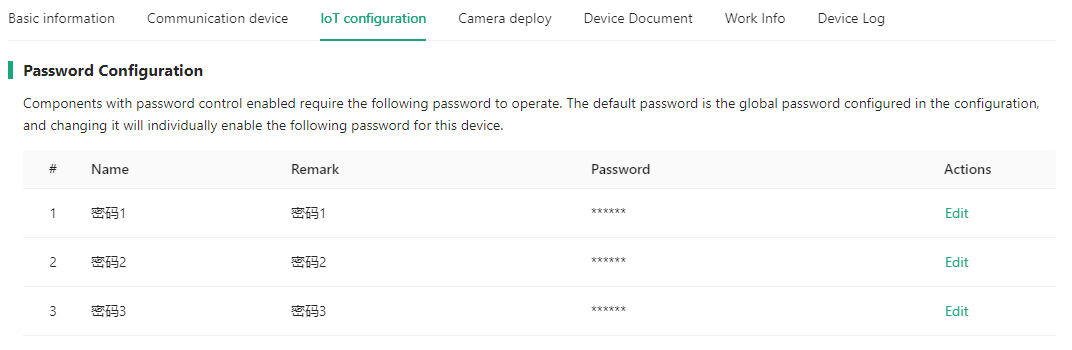
Can set the component control password and video address.c
- Password configuration
The component password function is introduced in Device Template . If you want to set a separate password for the device, set it here.
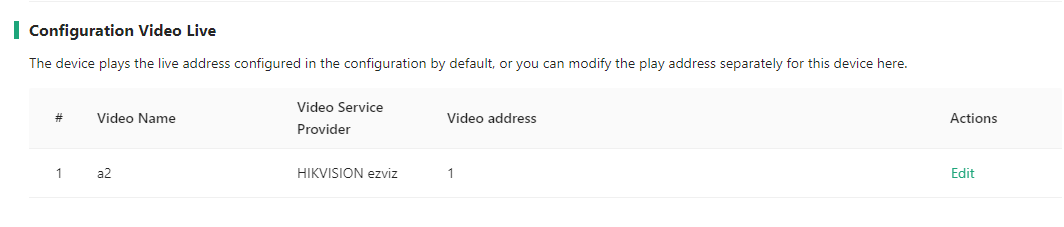
- Configure live video
After binding device template, the video address added in the template will be displayed here, and it can be modified for a single device.
After the video address is modified, the video component that references the address in the configuration will use the modified address instead of the address in the template.
Video Configuration#

After the platform is bound to the EZVIZ Cloud account, you can bind the camera here and manage it. Click the "Add Camera" button, fill in the camera device serial number and verification code in the pop-up dialog box, you can add it, and you can view the video in the device monitoring.
After the addition is complete, you can view the corresponding video in the platform's [Monitoring Screen] -> [Device Video], [Device Dashboard] -> [Real-time Video].
note
For the specific operation steps of adding a camera, please refer to the "Add Camera" document in [Fluorite Cloud Camera].
Device Documentation#

Add relevant documents to the equipment, such as equipment operating instructions, related videos, etc.
Click the [Add File] button to pop up a file selection dialog box, select the relevant document, and press the [Submit] button to add successfully.
note
The files in the dialog box need to be uploaded in [Document Management] -> [Document Library] in the left menu bar.
Work Messages#
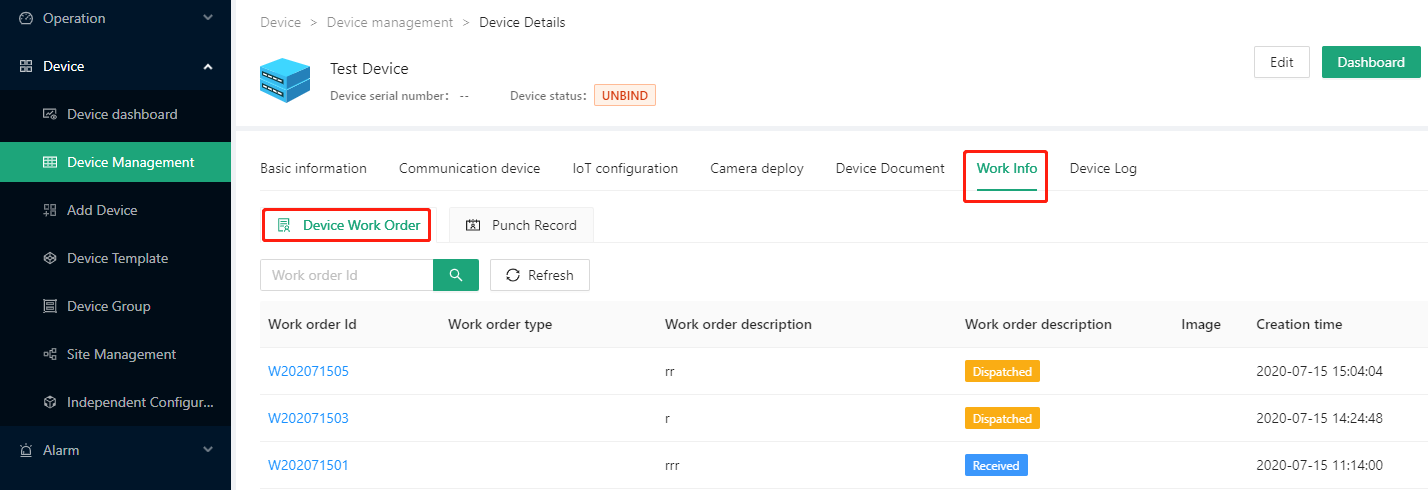
- Device work order
Record the repair and maintenance work orders of the device. You can search for the work order number directly.
lick the work order number to view more information about the work order, work order process, maintenance report, etc.
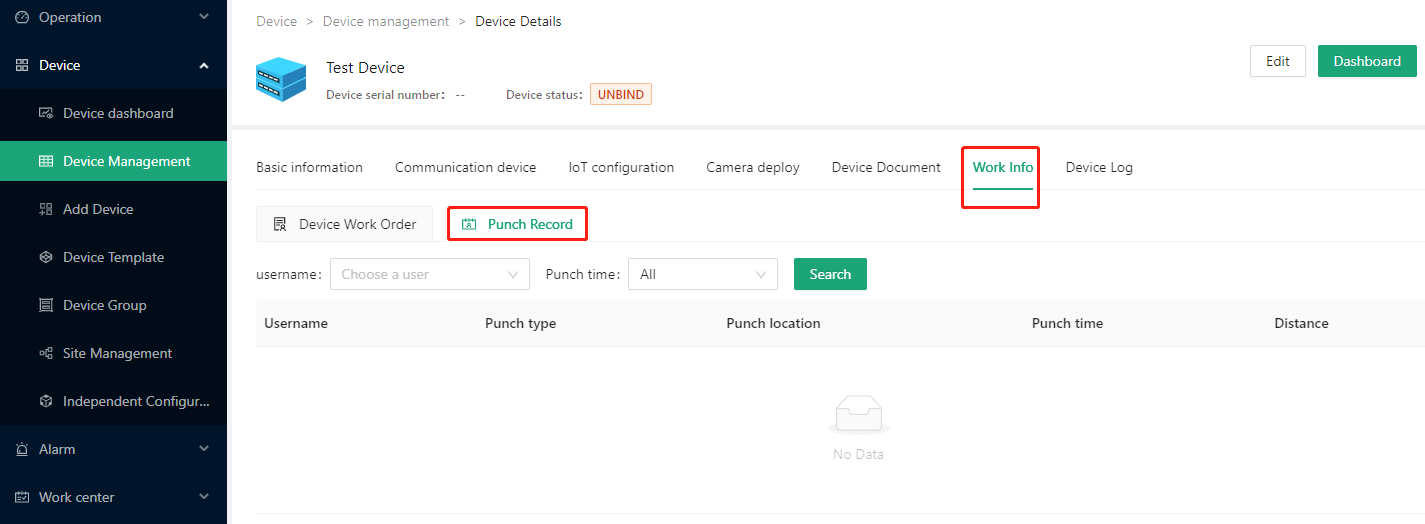
- Check-in record
Record the attendance records of all personnel associated with this device to check in, including user name, check-in type, check-in time, check-in location, check-in status, check-in location and distance to the actual device.
Users can filter according to employees in the system, and currently provide 3 kinds of filtering items: today, this week, and this month.
Device Log#
- Device log
Record the modification operations of some components in the monitoring screen of the device, including information such as the operator, operation time, and variable names.
- Online and offline records
Record the online and offline logs of the communication module bound to the device.
Share Configuration#
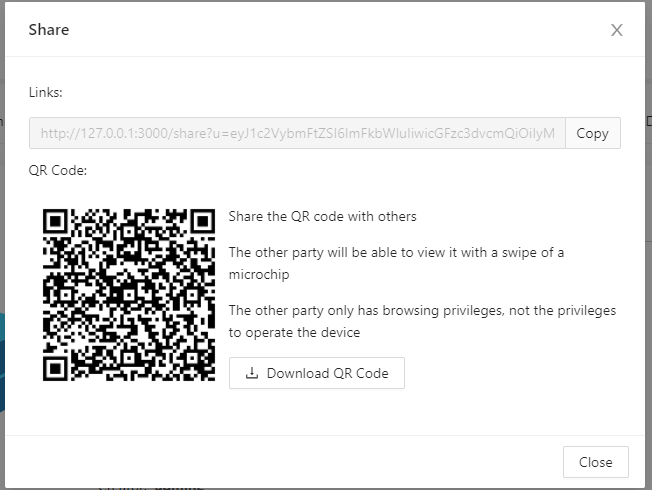
The function of sharing configuration is that users can view the configuration and operation of the device on a browser or WeChat without logging in to the platform.
In the device management list [Operation] column [More] drop-down list or in the upper right of the device details page, there is a [Share configuration] menu button.
Click the [Share Configuration] button to pop up, and the user can scan the QR code or copy the link address to share the device configuration.
Update Configuration#
If you modify or delete the variable data in the device template, click [Update Configuration] to rewrite the configuration information of the template into the communication module.
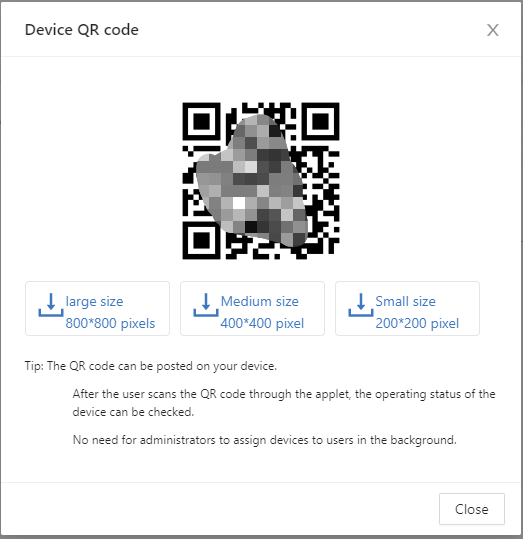
Device Code#
Each device can be exported in the form of a QR code, and other users in the same organization can scan the code through the WeChat applet to add the device. For a device added in this way, the user has no permission to operate the device, only the permission to browse data.